Bubble Brush Procreate a-Z, 0-9: A Practical Guide to Getting It Right
If you have ever spent an hour trying to hand-draw consistent bubble letters for a social media graphic or a digital planner cover, you know the frustration of uneven curves and wobbly lines. The Bubble Brush Procreate a-Z, 0-9 set exists to solve exactly that problem. It is not just a collection of random stamps; it is a curated toolkit designed to bring instant polish and professional flair to your digital artwork. For creators ranging from seasoned illustrators to busy small business owners, having a reliable font brush stamp can be the difference between a project that feels amateurish and one that commands attention.
However, simply downloading a brush pack does not guarantee a great result. Many users dive in without understanding how these specific assets work within the Procreate ecosystem, leading to wasted time and subpar designs. Let's look at what this tool actually offers, where people commonly go wrong, and how you can use it effectively to elevate your work.
What You Actually Get with the Bubble Font Stamp Set
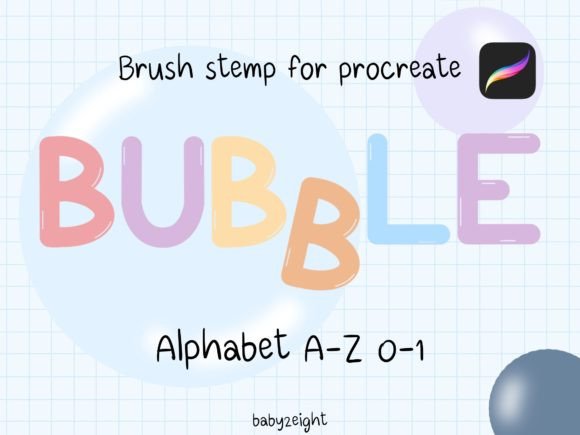
When you purchase or download the Bubble Brush Procreate a-Z, 0-9, you are receiving a single zipped file containing a total of 36 distinct brush stamps. This collection is broken down into two essential components: 26 alphabet brushes covering every letter from A to Z, and 10 number brushes ranging from 0 to 9. These are not standard text layers; they are custom brushes that allow you to "stamp" characters onto your canvas with full control over size, opacity, and blending modes.
This distinction is crucial. Unlike standard system fonts that lock you into rigid spacing and kerning, these brush stamps offer flexibility. You can stretch them, squash them, change their color mid-sentence, or apply texture overlays directly to the ink. Whether you are creating Instagram posts, designing covers for digital planners, or just making fun graphics for personal projects, this set provides the foundational elements needed for a cohesive bubble-letter aesthetic.
Common Mistakes When Using Custom Brush Stamps
Despite the utility of these tools, there are several pitfalls that even experienced artists fall into when using bubble font brushes. One of the most frequent errors is treating the stamps like traditional vector text. Users often try to resize the entire word after stamping it, which leads to pixelation and loss of quality. Because these are raster-based stamps, scaling them up too far will make them blurry. The better approach is to adjust the brush size settings before you tap the canvas, ensuring crisp edges at your desired dimensions.
Another common misunderstanding involves compatibility. Some users attempt to import these brushes into older versions of Procreate or other drawing applications that do not support complex stamp configurations. If you are not running the most updated version of Procreate, you may encounter missing textures, incorrect layer behaviors, or brushes that fail to load entirely. Always verify your app version before starting a project to avoid workflow interruptions.
Spacing is another area where results often suffer. Since each letter is a separate stamp, manual kerning is required. Beginners frequently place letters too close together, causing the bubbles to merge unintentionally, or too far apart, breaking the visual flow of the word. Without careful attention to alignment, the final text can look disjointed and unprofessional, undermining the effort put into the rest of the design.
How to Avoid Pitfalls and Maximize Efficiency
To get the best results from the Bubble Brush Procreate a-Z, 0-9 set, you need a strategic approach to your workflow. First, always organize your workspace. Create a dedicated layer for your text before you begin stamping. This allows you to move the entire word around later if needed without affecting your background art. If you find yourself constantly adjusting individual letters, consider grouping them once the spacing looks right.
For better spacing, utilize Procreate's transformation tools. After stamping a few letters, select them as a group (if on the same layer) or use a guide layer to check alignment. A practical tip is to zoom out periodically to see how the word reads as a whole rather than focusing on individual characters. This helps maintain consistent rhythm and prevents the "clumped" look that plagues many beginner designs.
Color application is also more versatile with these brushes than with standard fonts. Instead of picking a flat color from the palette, try applying a gradient map adjustment layer clipped to your text layer. This instantly gives your bubble letters depth and dimension without requiring you to manually paint shadows on every single curve. This technique saves hours of work and ensures a uniform style across all your letters and numbers.
What to Check Before You Download or Buy
Before committing to any digital asset, including this bubble font collection, it is wise to perform a quick evaluation. Ensure that the file format is compatible with your device. The package should arrive as a compressed zip file that extracts easily on your iPad. If the file structure is messy or requires third-party software to open, it may cause unnecessary friction in your creative process.
Check the resolution of the preview images provided by the seller. High-quality brush stamps should appear sharp even at large sizes. If the previews look pixelated, the actual brushes likely will too. Additionally, verify the license terms. While these brushes are excellent for personal projects and commercial use like Instagram marketing or client work, some licenses restrict resale of the raw files. Understanding these boundaries protects you from potential legal issues and ensures you are using the assets ethically.
Finally, consider your specific needs. Do you really need the full A-Z and 0-9 set? If you only create simple headers, a smaller subset might suffice, but for comprehensive branding, planning, or educational materials, the complete 36-stamp set is invaluable. Having the numbers included is particularly useful for dates, prices, and countdowns, which are staples in digital planning and promotional content.
Bringing Your Graphics to Life
The Bubble Brush Procreate a-Z, 0-9 is more than just a shortcut; it is a foundation for creativity. By avoiding common mistakes like improper scaling and ignoring spacing, you can transform simple text into engaging visual elements. Whether you are a blogger needing eye-catching titles, an educator creating worksheets, or a freelancer delivering client logos, the efficiency gained from using high-quality brush stamps is undeniable.
Remember, the tool is only as good as the artist wielding it. Take the time to learn the nuances of stamping, experiment with blending modes, and always keep your Procreate app updated. With these practices in place, you will find that creating polished, professional graphics becomes faster, easier, and significantly more enjoyable.